I had a great day flying a Sparrow (catapult glider)!
The one I made from a kit flies great.
Here’s a bit of video and pictures from my walk.

I had a great day flying a Sparrow (catapult glider)!
The one I made from a kit flies great.
Here’s a bit of video and pictures from my walk.

As it turns out Wild Wing is a pretty good place for a model plane meetup. I went there for a drink after flying catapult gliders.
I also tested the Sparrow I built yesterday. In a nutshell, it flew great. I needed the entire ballast. It worked better launching it banked right. Got some amazing flights.
The other Sparrow, Lloyd Shales gave me flew great too. The tail boom/handle broke off. Interestingly I discovered an alternate way to launch it. I made a splint to help repair the fuselage and it was thicker and acted as a handle. So I used that to pull it back on the catapult. Seemed to be easier except the tailplane would often brush releasing hand and was getting a bit of wear.
I brought out the Hammer Down Catapult Glider by Bill Khul as well. The plans are at his ScienceGuy site. It worked great as a hand launch glider. It seemed to pitch up quite a bit during a catapult launch and seemed to unhook from the catapult early so it wasn’t getting a full push. I will have a look at that.
Here’s another video from another session:


The other day I spent an afternoon flying a Sparrow catapult glider.
Designer Lloyd Shales lives near me and I visit him occasionally to share ideas about model aviation. Lloyd is also known for his Minnow which is a stick and tissue model.
Lloyd gave me a Sparrow all ready to go as well as a kit one day. It sat in my inbox with a whole whack of other project. I’m getting caught up on things so the project finally came forward.
Wow, I didn’t realized what I was in for. I fell in love with the design right away and couldn’t get enough of flying it.
Now I’m curious what’s involved with making one. I had a kit on hand so this afternoon I sat down to give it a whirl.

The Sparrow kit is laser cut, hand cut and carved. I can tell Lloyd puts a great deal of love and care into these kits.
All you need (aside from the kit) is glue. You can use craft glue, white glue, carpenter glue, ambroid, or CA. I prefer craft glue because it’s safer and has no smell. I used Eileene’s Tacky Glue since I had it on hand. I think wood glue would work great. Especially the ones that are more grabby.
The tow hook is installed and the catapult is already assembled.

As you can see in the image, even the gull wing seems are beveled.
All the parts are ready for sanding with the included sand paper.
In a nutshell you just smooth out the edges and the surfaces. Trick is to not sand the areas where the wing, tailplane or fin will be attached.
That step took about 5 minutes.
The next step was to start gluing the pieces together. There are only 6 pieces!


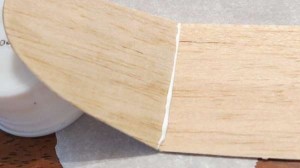
I glued the gull wing tips first as was suggested in Lloyd’s instructions.
I used wax paper underneath the glue joints to protect the work surface but one could have used the packaging.
I used a glass for weight and some plastic cups to prop up the wing joints.


I then glued the tailplane and fin.
I found it easy to lay it on the table to easily see the alignment.
After the wing and tail feathers were starting to set, I added the ballast so that I could place the wing upside down on the glass and balance the fuselage on it.
This made it easy to glue the wing onto the plane. Now it’s just a matter of waiting for the glue to dry!
Stand by for a report on trimming and flying!

I enjoyed the Sparrow so much I decided to make another one. The one I already have was build by designer Lloyd Shales. I happen to have a kit on hand.
Wow, it’s pre-shaped! I will shoot some pictures of building it and report back.