The other day I spent an afternoon flying a Sparrow catapult glider.
Designer Lloyd Shales lives near me and I visit him occasionally to share ideas about model aviation. Lloyd is also known for his Minnow which is a stick and tissue model.
Lloyd gave me a Sparrow all ready to go as well as a kit one day. It sat in my inbox with a whole whack of other project. I’m getting caught up on things so the project finally came forward.
Wow, I didn’t realized what I was in for. I fell in love with the design right away and couldn’t get enough of flying it.
Now I’m curious what’s involved with making one. I had a kit on hand so this afternoon I sat down to give it a whirl.

The Sparrow kit is laser cut, hand cut and carved. I can tell Lloyd puts a great deal of love and care into these kits.
All you need (aside from the kit) is glue. You can use craft glue, white glue, carpenter glue, ambroid, or CA. I prefer craft glue because it’s safer and has no smell. I used Eileene’s Tacky Glue since I had it on hand. I think wood glue would work great. Especially the ones that are more grabby.
The tow hook is installed and the catapult is already assembled.

As you can see in the image, even the gull wing seems are beveled.
All the parts are ready for sanding with the included sand paper.
In a nutshell you just smooth out the edges and the surfaces. Trick is to not sand the areas where the wing, tailplane or fin will be attached.
That step took about 5 minutes.
The next step was to start gluing the pieces together. There are only 6 pieces!


I glued the gull wing tips first as was suggested in Lloyd’s instructions.
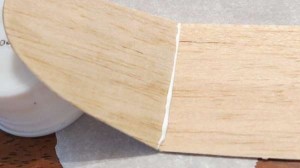
I used wax paper underneath the glue joints to protect the work surface but one could have used the packaging.
I used a glass for weight and some plastic cups to prop up the wing joints.


I then glued the tailplane and fin.
I found it easy to lay it on the table to easily see the alignment.
After the wing and tail feathers were starting to set, I added the ballast so that I could place the wing upside down on the glass and balance the fuselage on it.
This made it easy to glue the wing onto the plane. Now it’s just a matter of waiting for the glue to dry!
Stand by for a report on trimming and flying!


Are kits avalable?I wold eagerly buy 5-6.
Yes, they’ve been available for about 12 years at this site.